iOS Unit Test Master 101 — Vol. 1
Tips and concepts to elevate your unit testing skills in iOS Development.

When we talk about testing software, we can clearly remember the Testing Pyramid. Today we're going to talk about the cheapest and the easiest type of test: the Unit Tests.
Summary of this document
- What is Unit Testing
- Why do we test?
- What, Why, How’s of testing
- TDD vs. BDD
- Basic Concepts
- Test Doubles
- Fixtures
- Reflection
- Async Tests
- Code Coverage
What is Unit Testing?
Unit testing is a way of testing a unit of some software component. By unit, I mean the smallest piece of code that can be logically isolated or a set of objects interacting with each other. It can be a function, a method, or a property.
Why do we test?
Unit testing means delivering more quality code to our users. You may think "But our users can't see the code…" and you're right, but they see the final result of your hard work, and if you write unit tests, it ensures that your code was tested and a lot of scenarios that would cause bugs that lead to a bad user experience was covered.
When we say “delivering quality code” we’re saying that:
- Tests help us make changes in our code with confidence;
- Forces you to think through your code and make it more testable;
- Testing can save time and money, bugs can be found earlier.
How do we test?
To start testing, you need to make your code testable. The easiest way to achieve this goal:
1. Your object should never create its dependencies
Dependencies refer to the relationships between different components, these relationships indicate that one component relies on another to perform its function correctly. The function below depends on the Serviceclass, but at the same time, it is also responsible for creating it.
final class Repository {
  func request() {
    let service = Service()
    service.callAPI()
  }
}
2. Your object should ask for the dependencies
This class should not be responsible for using and creating its dependencies, but instead, should ask for them. That’s when Dependency Injection comes in handy.
One of the many ways to inject dependencies into your class is to move the dependent object to the initializer. Now, this class does not care about how this object is created, but instead, it is just enjoying the methods and properties available.
final class Repository {
  let service: Service

  init(service: Service) {
    self.service = service
  }

  func request() {
    service.callAPI()
  }
}
That way, you can inject any object you want, even the fake ones to mimic the real classes. Your class will never know, I swear. These objects are called test doubles. You can use test doubles to mimic real objects and make them do what you want. We're gonna see more about this later in this article.
What do we test?
We should base our tests on the application behavior and not on implementation details.
Pretty much everything is testable, but you shouldn't rely on getting 100% code coverage, you should think about what is important to be tested, like what your code does. Quality over quantity. Below I listed some things I consider important to be tested:
- Business logic: if you work in a banking app, guarantee that the transfer functions are working as expected, with the right inputs and expected outputs. Write as many scenarios as you want, with negative numbers, empty, strings.
- Architecture cycle: choosing an easily testable architecture will make your tests a lot easier, and testing your architecture cycle will help you guarantee that all classes and layers are working properly;
- Business-oriented layout: sometimes we need to make layout changes due to some business rules. You can test if your class components behave as expected when these rules change. To better improve tests for your views, take a look at UI Testing and Snapshot Testing.
- Behavior: we should base our tests on the application behavior and not on implementation details. This means that if you change an
Arrayto aSetfor performance reasons, for example, the tests should not break. If it breaks, the behavior will change and it will affect the final user.
TDD vs. BDD
These are acronyms for some techniques used for tests.
- Test-Driven Development (TDD): It's when you write your tests before the functionality. Because of this, the tests are going to fail. Your job is to write the simplest code that can make the test pass and with this, you can start refactoring. This process is called Red, Green, Refactor;
- Behavior-Driven Development (BDD): It's the process of writing and running tests with a prior understanding of user behavior. Unlike TDD, BDD generally begins by developing the system's behavior. The main advantage is the common language used to write tests because it can be understood by technical and non-technical teams.
Basic concepts
Best Practices
Before we start with code, we can follow the FIRST principles to achieve a good test stack:
- Fast: avoid writing tests that need to wait for things to happen, tests need to be run and show you the desired output in a matter of seconds, even if there are thousands of unit tests;
- Isolated / Independent: your test should run in random order without failing and cannot produce side effects for other tests; Tests cannot depend on external factors (databases, real network requests, language, current timezone, etc);
- Repeatable: tests should return the same result every time they run;
- Self-validating: tests should validate themselves, without manual checking. For naming conventions, make it descriptive to understand what's being tested;
- Thorough: This means your tests need to cover all paths, edge cases, arguments, and variables. Literally, everything.
Libraries
Since this article is about testing in iOS, I'm going to use XCTest. It's a native library for creating and running tests, UI tests, and performance tests. You can search for more frameworks like Quick and Nimble.
Sut
SUT is what we call what we’re testing, it’s called Subject Under Test or System Under Test.
Use setUp( ) and tearDown( )
setUpmethod will be called before each test. Use it to set up your SUT.tearDownmethod will be called after each test. Use it to perform a cleanup.
private var sut: MyView?

override func setUp() {
  sut = MyView()
}

override func tearDown() {
  sut = nil
}
I lied. You don't really need setUp and tearDown… 🤔
According to Apple's Documentation, the setUp and tearDown methods are not required.
In the default case when run tests, XCTest finds all the test classes and, for each class, runs all of its test methods. (All test classes inherit from
XCTestCase.)For each class, testing starts by running the class setup method. For each test method, a new instance of the class is allocated and its instance setup method executed. After that it runs the test method, and after that the instance teardown method. This sequence repeats for all the test methods in the class.
The following code should work:
final class TestClass: XCTestCase {
  private let sut = MyView()
}

// Or if you want to inject dependencies into MyView

final class AnotherTestClass: XCTestCase {
  private var serviceSpy = ServiceSpy() // This is not the real Service. You discovered your first test double!
  private lazy var sut = MyView(service: serviceSpy)
}
This works because, for each test within your XCTestCase class, a new instance of the class is created and allocated. On the other hand, the objects will not be deallocated until all tests finish running. Anything not released in the tearDown will continue to exist, even while other tests run.
For normal objects, you will probably see no problem at all, but you will face issues with Singleton since they can share state across unit tests if you don't release them. If that is your case, just reset the singleton’s properties on setUp or tearDown
Given-When-Then (GWT)
This style/template is part of BDD (Behavior-driven-development), and we use it to make the way we describe some functionality more readable.
GIVEN: it's when we define the starting data and set up our objects;WHEN: It's the key action; we need to call the method under test with the given parameters;THEN: here we verify the system output and see if it behaves expectedly.
We can read it like this: given a context, when some condition happens, then expect some output.
At the beginning, you can also add some // Given, When, Then comments to your test to better separate functions and properties. Over time, comments will no longer be necessary.
func test_sum_givenTwoValues_shouldReturnCorrectSum() {
  // Given - two values
  var a = 1
  var b = 1

  // When - sum function is called
  let result = sut.sum(a, b)

  // Then - The expected result
  XCTAssertEqual(result, 2)
}
Arrange-Act-Assert (AAA)
Almost like GWT, this pattern is also used to facilitate our test readability and suggests that you divide your test into three sections:
ARRANGE: it's when you set up your objects and set some data;ACT: will invoke the method under test with the arranged parameters;ASSERT: verify if the method under test behaves as expected;
These two patterns are pretty much the same and it's up to you to decide which one fits your development.
For me, GTW opens up possibilities, since non-technical people (like business people) can understand it due to its reading naturality.
Test Doubles
Test doubles are test objects that are used to mimic the behavior of some real object. The difference between them is that you will define the responses and the scenarios you want the doubles to have.
"Test Double is a generic term for any case where you replace a production object for testing purposes."— Martin Fowler
Dummy
Dummies are potato objects that are just used to satisfy method parameters and act as a placeholder. This means that you don't do asserts with these objects. They just… exist.
In the above example, NetworkDummy is doing nothing more than acting as a placeholder.
Fake
Objects that have working implementation but with a reduced logic. For example, if you have a complex class performing a validation to save something in a local database, you don't need to recreate or perform all these validations again, you can fake it and just return the result you need.
Stub
You use stubs to control the outcome of some dependency methods. The example below shows that we can change the fetchDataToBeReturned value when testing to make it return the scenarios we want to.
Spy
You can use it to inspect the properties of some dependencies. The example below allows you to assert if the fetchDatathe method was called and what it was passed.
The properties should be using private(set) access. This means that the property is public for the getter, but private for the setter. You can only read it from the outside, and this is what we want in our tests.
It's also very common to create a Spy that is also a Stub, so you can end up with a class like this:
Mock
As we usually see in a lot of articles, mocks aren't classes that we just see the number of times a method was called.
Mocks are pre-programmed with expectations which form a specification of the calls they are expected to receive.
Since mocks are complex classes, the community always relies on Frameworks, like Mockito or jMock (both written in java), they're clean and ready to use. For Swift, we have a limited number of mock frameworks and they require some boilerplates because Swift doesn't have some of the features needed to make really worth using.
For that reason, when we write our doubles we usually use Stub or Spies.
Fixtures
The problem
This is a very cool pattern.
Given the following scenario where you have multiple unit tests that create the User object, what is going to happen if you add a new property in the initializer?
struct User {
  let name: String
  let age: Int
  let id: UUID
}

// Inside unit testing class ..
func test_something() {
    User(name: ..., age: .., id: ...)
}

func test_something2() {
    User(name: ..., age: .., id: ...)
}

func test_something3() {
    User(name: ..., age: .., id: ...)
}
If you answered that you need to fix all tests, you are correct. Now, imagine at a large scale.
Solution
Unit test fixtures vary based on context, programming language, or framework. In iOS Development, fixtures can be used as static functions that will contain all the necessary code to initialize some object.
You'll use it instead of using the concrete class initializer within our test methods. Here's an example:
That’s it. What about the benefits?
Benefits
As you can see, we usually write the fixture method with nil, empty or default values. This is going to make your tests understandable and cleaner because:
- you should explicitly write your initializer's parameter values;
- you ain't gonna need to write all the parameters every time, just the ones you are going to use, like this example:
The last benefit of fixtures is that when new dependencies are added to the class initializer, you just need to add them once within the fixture. You don't have that benefit when using the default class initializer, all the tests using it are going to fail and will need to be updated.
Reflection
Reflection is a common programming language feature that enables us to examine and modify the behavior of methods, classes, and interfaces at runtime.
Mirror
In Swift, the reflection is made available through the Mirror API. It's a standard library and the access to the objects we want is read-only.
In this example, we have a simple class Person that contains name and age properties. When we mirror it, we can iterate over the class children and access all properties that it valueis of type String, for example. In our case, if we had more String properties, they would be printed.
Of course, we don't want to cast every time we want to access some property. So, we can make an extension to return the first property matching the type (String, Int, UILabel, etc) and the label (your property name as String type) provided by the method's parameters.
With this made, now we can access all the properties we want easily. In this example, I'm accessing the name property that is of type String.
Async Tests
When doing tests for async calls, is common to use XCTestExpectation followed by a call to wait(for: XCTestExpectation, timeout: Int) and there is no problem using it, but if you make assertions inside the completion block, you'll see its impact in the future. See the example below:
What is wrong with it? When you perform multiple async assertions, some tests can interfere with each other. To prevent this, the assertions should never be made inside the completion block, but rather, the values to be asserted can be captured from the completion and asserted after the wait call, like this example:
Code Coverage
Last but not least, we're going to talk about code coverage. You can enable this feature in your Xcode following the steps below:
- Tap in your app scheme and select
Edit Scheme... - Choose the
Testoption on the left side menu - Select the
Optionstab - Look for
Code Coverageoption and mark the checkbox, withall targetsselected

Try to run your tests. You can now check how much of your project was covered:
- Go to the
Reportnavigator item and select theCoverageoption
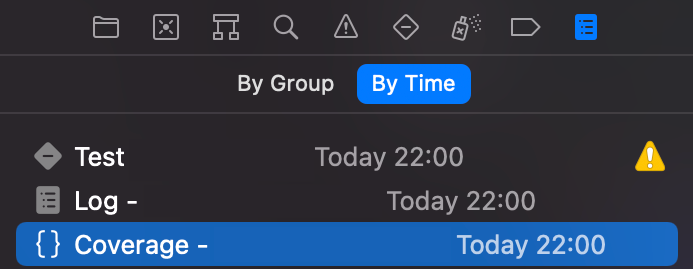
2. Xcode will show you a list with all your classes and the coverage percentage for each one.
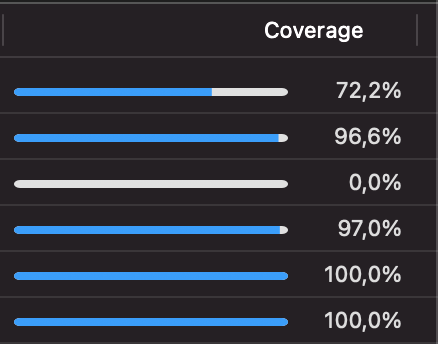
The code coverage shows which part of your code was covered (in green), which part was not (in red) and which scenarios within a function were not called (with stripes).
Getting 100% of code coverage doesn't mean that everything is tested but that your tests have passed through your code. You don't need to think about getting 100% code coverage, but about improving your code to make it more testable and testing every scenario possible to guarantee quality.
Conclusion
This is the end of this article and you may have noticed that I left some topics behind, like how to test gestures, views with storyboard or .xib, and maybe a really deep knowledge about some of the topics listed in this article.
The real objective of this article was to guide you through some concepts about how we unit test, show some techniques, and a lot of benefits. To master unit tests, you need to practice and implement this culture in your projects every day.
If you have any feedback or suggestions, feel free to contact me on Linkedin
That's it! Hope you learned something new today. See you soon :)